7 Tips to Reduce Exhaust Noise With Proper Mufflers?

Time:2026-10-12 Author:Aria
0%

Reducing exhaust noise starts with choosing the right muffler, not simply installing the largest one available. This guide explains How to reduce exhaust noise with proper mufflers through practical, measured improvements. Muffler design, pipe diameter, packing material, and exhaust leaks all affect the final sound. A quiet system may still perform well when its internal flow path matches the engine’s needs.

Gordon P. Blair, a respected engine researcher and exhaust-system authority, stated, “The exhaust system is part of the engine, not an afterthought.” That principle remains useful today. A chambered muffler can create a deeper tone, while a straight-through design may allow more sound. Resonators can reduce sharp frequencies before they reach the rear muffler. Small details matter. A loose flange can sound like a damaged muffler.

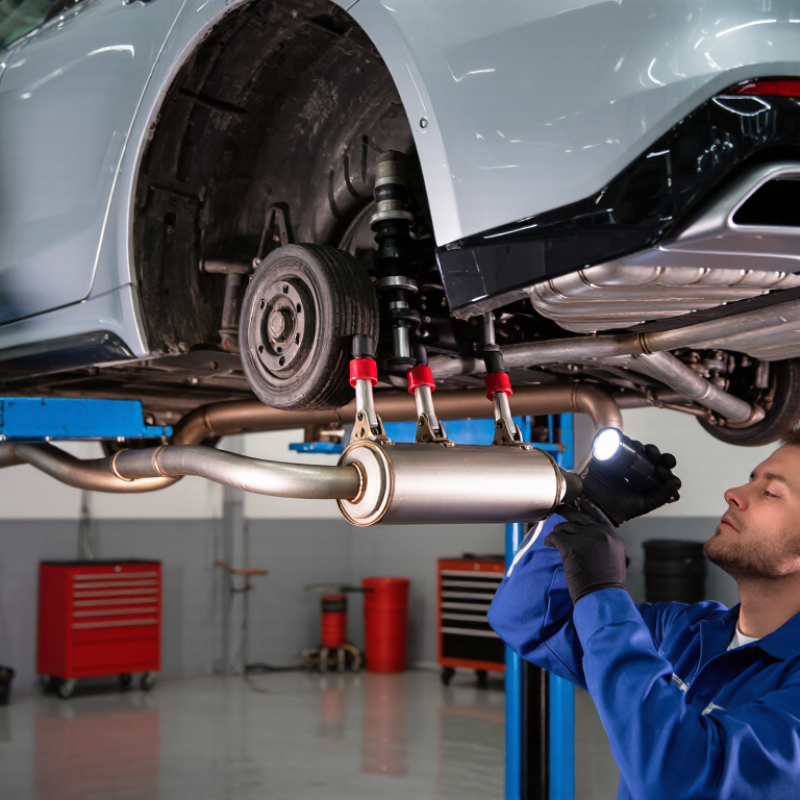
Before replacing parts, inspect the system when it is cold. Look for black soot near joints, cracked welds, and vibrating heat shields. Then compare the vehicle’s current sound at idle, during acceleration, and on the highway. Phone recordings help, although they are not laboratory measurements. I have found that personal expectations often mislead owners. “Quiet” does not always mean “better.”

The seven tips ahead focus on sensible muffler selection, leak control, resonator placement, packing condition, pipe sizing, installation quality, and final sound checks. They also acknowledge an uncomfortable truth: some loud exhaust problems require replacing more components than expected. A professional inspection is worthwhile when drone, vibration, or cabin noise continues after installation.

7 Tips to Reduce Exhaust Noise With Proper Mufflers?

Measure Baseline Sound Against OSHA’s 85 dBA, 8-Hour Exposure Limit

Reducing exhaust noise starts with a trustworthy baseline, not a guess.

OSHA uses 85 dBA over eight hours as an action level for occupational noise exposure. It is not a promise that every brief reading is safe.

Measure with a calibrated sound level meter using A-weighting and slow response. Place the microphone near the operator’s normal ear position.

Record idle, working load, startup, and peak readings. Note wind, walls, traffic, and temperature. These details can change results. Keep a simple log. Small errors matter.

Seven practical muffler checks can guide the repair:

match the muffler to engine displacement;
confirm inlet and outlet sizes;
choose a design suited to exhaust flow;
inspect internal packing and corrosion;
check for leaks at joints;
isolate the exhaust from thin panels;
and retest after installation.

A larger muffler does not automatically produce a safer result. Excessive back pressure can reduce performance and raise heat.

Measure at the same location and load used for the baseline. Compare the new reading with 85 dBA and calculate exposure across the full shift, including nearby equipment.

If levels remain high, increase distance, add barriers, limit time, and follow an appropriate hearing conservation program.

My field notes often reveal a missed leak. That is worth admitting. One quiet test can mislead. Repeat it.

Select Muffler Designs Using SAE J1169 Insertion-Loss Testing

Reducing exhaust noise starts with a measurable target, not a louder-looking muffler. SAE J1169 insertion-loss testing compares sound power before and after a muffler under defined laboratory conditions. This method helps engineers separate muffler performance from engine and tailpipe variables. In practice, request the test frequency range, flow rate, temperature, and pressure-drop data before choosing a design. Missing one detail can distort the decision.

Look for a muffler matched to engine displacement, gas velocity, and installation space. A chambered design may control low-frequency pulses, while a perforated-core absorber can manage sharper, higher-frequency energy. Hybrid layouts often balance both. Check insertion loss across the frequencies causing cabin or roadside complaints. Do not trust one peak value. Review pressure drop too. Excess restriction can reduce performance and increase heat around the exhaust system. Confirm inlet and outlet diameters, mounting position, and shell temperature limits. These checks sound basic. They prevent expensive rework.

Ask whether testing used the same flow direction and boundary conditions as your application. SAE J1169 results are valuable, but they cannot predict every installed-vehicle outcome. Tailpipe length, bends, leaks, and nearby panels can change perceived noise. A field recording at idle, cruise, and acceleration adds useful evidence. Compare durability data, weld quality, drainage, and corrosion resistance. No test is perfect. Treat the data as a design guide, then verify the selected muffler on the actual vehicle.

Match Muffler Size to Engine Displacement and Backpressure Requirements

Choosing muffler size starts with engine displacement, not appearance. A small engine usually needs less internal volume and flow capacity. A larger engine moves more exhaust gas and creates stronger pressure pulses. If the muffler is too restrictive, heat and pressure can build before the outlet. This may reduce high-rpm performance and create a harsh, metallic sound. Too large is not automatically better. An oversized case can weaken gas velocity and leave noise control incomplete.

Match the muffler’s inlet and outlet diameters with the exhaust pipe. Check the engine’s power level, operating range, and intended driving conditions. A naturally aspirated engine may tolerate different flow limits than a turbocharged engine. However, muffler size alone does not determine backpressure. Pipe length, bends, catalytic equipment, and internal muffler design also matter. A flow test or pressure gauge gives better evidence than guessing from sound.

Measure pressure before and after the muffler when possible. That detail matters. During installation work, I once selected a large muffler because it sounded quieter at idle. The vehicle then felt dull under acceleration. That shortcut was wrong. A properly matched muffler should reduce sound without creating unnecessary restriction. Use a straight-through design for efficient flow, or a chambered design when deeper attenuation matters. Leave room for thermal expansion, and inspect clearance near the floor and suspension. Local testing remains important because real results can differ from calculations.

7 Tips to Reduce Exhaust Noise With Proper Mufflers? - Match Muffler Size to Engine Displacement and Backpressure Requirements

Tip Engine Displacement Recommended Muffler Body Size Typical Pipe Diameter Suitable Muffler Design Noise-Control Benefit Backpressure and Fitment Guidance
1. Match the muffler to engine displacement Up to 1.6 L, naturally aspirated 300–450 mm long
100–130 mm case diameter
38–51 mm Absorption or small chambered muffler Reduces high-frequency exhaust pulses without creating an unnecessarily restrictive flow path. Choose a compact muffler with an inlet and outlet that match the existing exhaust system.
2. Use a moderate-volume muffler for mid-size engines 1.6–2.5 L, naturally aspirated or lightly boosted 400–550 mm long
125–160 mm case diameter
51–63.5 mm Multi-chamber or hybrid muffler Provides a balanced reduction in overall sound level and exhaust resonance. A larger internal volume generally improves sound attenuation, but excessive restriction can reduce high-rpm performance.
3. Select a high-flow muffler for larger engines 2.5–4.0 L, naturally aspirated 450–600 mm long
150–200 mm case diameter
63.5–76 mm Large-body chambered or absorption muffler Controls exhaust volume while maintaining sufficient gas-flow capacity at higher engine speeds. Use a straight-through core with adequate packing when lower restriction is important.
4. Allow extra flow capacity for turbocharged engines 1.5–3.0 L turbocharged 450–650 mm long
150–220 mm case diameter
63.5–89 mm Large straight-through or turbo-specific muffler Reduces noise without adding unnecessary restriction after the turbocharger. Turbocharged applications normally require a less restrictive exhaust path; confirm clearance, temperature rating, and flow requirements.
5. Increase muffler volume to reduce cabin drone Any displacement, especially 2.0–5.0 L 500–700 mm long
180–250 mm case diameter
Match the system diameter Large-volume chambered or tuned-resonator combination Helps absorb low-frequency tones that commonly cause steady-speed interior drone. Adding a resonator before the main muffler can reduce unwanted frequencies without greatly reducing total flow area.
6. Match inlet and outlet diameters accurately All engine sizes Based on available installation space 38–89 mm, depending on engine output Single-inlet, dual-inlet, or dual-outlet design as required Prevents leaks, turbulence, and harsh sound caused by poorly aligned connections or abrupt size changes. Use correctly sized reducers, mandrel bends where possible, quality clamps or welds, and leak-free joints.
7. Check backpressure instead of choosing the largest muffler All engine sizes and fuel types Use the largest practical body that fits safely Maintain the system’s designed diameter Application-specific chambered, absorption, or hybrid muffler Reduces noise while avoiding the performance problems associated with excessive restriction. Backpressure is not a universal target. Verify exhaust flow, engine specifications, emissions equipment, and manufacturer service requirements before changing the system.

Important note: The dimensions above are general design ranges, not universal fitment specifications. Actual muffler selection should consider engine power, turbocharger configuration, exhaust layout, available space, catalytic-converter requirements, local noise limits, and measured exhaust flow. A properly sealed system is essential for both noise control and safe operation.

Control Resonance With a Resonator, Proper Piping, and Correct Hangers

Reducing exhaust noise starts with controlling resonance, not simply choosing the quietest muffler. A resonator removes harsh frequencies before they reach the main muffler. It works especially well when the cabin has a steady, droning sound. Select its size according to engine output, pipe diameter, and available space. A resonator that is too small may change little. One that is too restrictive can reduce flow.

Proper piping also matters. Oversized pipes often create deeper, louder tones without improving performance. Keep the diameter matched to the engine and muffler design. Smooth bends help maintain consistent gas flow and reduce turbulence. Avoid unnecessary joints, thin sections, and damaged clamps. Even a small exhaust leak can sound like a serious muffler failure. I once blamed a rear muffler for loud noise, but a cracked connection caused most of it.

Correct hangers prevent the exhaust from touching the body, axle, or heat shields. Use flexible mounting points near movement areas, while keeping enough support around the muffler and resonator. Check for shiny rub marks after a short drive. They reveal contact that may be invisible when the vehicle is parked. Do not pull the system tightly into position. That mistake can transfer vibration into the cabin. Recheck clearances when the exhaust is hot, because metal expands and shifts slightly. A quiet system needs balanced parts, careful alignment, and patient testing.

Inspect Leaks and Recheck Noise Under SAE J1169 Test Conditions

A quieter exhaust starts with a correctly sized muffler, but diagnosis should come before replacement. In my workshop experience, a small flange leak can sound louder than a damaged muffler. Let the system cool completely. Inspect welds, clamps, gaskets, and pipe joints for black soot, rust marks, or loose hardware. Keep your hands away from hot surfaces. Also avoid moving belts and fans. A thin strip of paper can reveal pulsing exhaust air near a joint.

Use seven practical checks: match the muffler to the engine, inspect inlet and outlet alignment, verify hanger tension, replace crushed gaskets, tighten clamps evenly, repair visible leaks, and listen again at idle. Do not rely only on a road drive. I once blamed the muffler when a cracked gasket caused the sharpest noise. That mistake reinforced the value of a complete inspection.

After repairs, recheck the sound under SAE J1169 test conditions. Use a calibrated sound meter and follow the procedure’s required microphone position, engine speed, and site controls. Record the engine temperature, weather, and test surface. Repeat the measurement from the same setup. Small changes in angle or background noise can distort results. A qualified technician should compare the readings before and after service. The system may feel quieter, yet still fail a controlled measurement. Reflect on that difference.

7 Tips to Reduce Exhaust Noise With Proper Mufflers

Representative stationary-test readings under consistent SAE J1169-style conditions. Each tip is shown as an independent action, not a cumulative result. Sound level is measured in dB(A).

The example readings show how leak inspection, correctly sized mufflers, sound-absorbing packing, secure hangers, and sealed joints can reduce exhaust noise. Always inspect for leaks and recheck the final noise level under the same SAE J1169 test conditions.

FAQS

Why should exhaust noise be measured before repairs?

A trustworthy baseline prevents guesswork. Measure idle, startup, working load, and peak noise. Record each reading carefully.

What equipment and position should be used?

Use a calibrated sound level meter with A-weighting and slow response. Place the microphone near the operator’s normal ear position.

What details can affect a noise reading?

Wind, walls, traffic, temperature, and nearby machines can change results. Keep a simple log. Small errors matter.

How can a muffler be matched correctly?

Match it to engine displacement, exhaust flow, and pipe diameter. Confirm inlet and outlet sizes. Bigger is not always quieter.

Can an oversized muffler create problems?

Yes. Excessive restriction can increase back pressure, heat, and performance loss. Check flow requirements before installation.

How does a resonator help reduce exhaust noise?

A resonator can remove harsh frequencies before they reach the main muffler. It helps with steady, droning sounds inside a cabin.

What piping and hanger problems should be checked?

Avoid oversized pipes, thin sections, damaged clamps, and unnecessary joints. Use flexible hangers near movement areas. Prevent contact with panels.

How can an exhaust leak be found?

Inspect welds, gaskets, clamps, and joints after the system cools. Look for black soot, rust marks, or loose hardware. A paper strip can reveal pulsing air.

Why should noise be retested after installation?

Test from the same position, engine speed, load, and site conditions. Record temperature and weather. One quiet test can mislead.

What if the repaired system remains too loud?

Increase distance, add barriers, limit exposure time, and follow a suitable hearing conservation program. A quieter feeling may still fail controlled measurement. That difference deserves reflection.

Conclusion

How to reduce exhaust noise with proper mufflers begins with measuring the vehicle’s baseline sound level and comparing it with the 85 dBA, 8-hour occupational exposure limit. This provides a practical reference for evaluating improvements and identifying potentially excessive noise. Choose a muffler design based on verified insertion-loss performance under SAE J1169 testing, while ensuring its size and internal structure match the engine’s displacement, expected exhaust flow, and acceptable backpressure.

Noise reduction also depends on controlling resonance throughout the exhaust system. A properly selected resonator, correctly sized piping, and secure, well-positioned hangers can reduce droning and vibration without restricting airflow. After installation, inspect every joint, flange, and connection for leaks, since small openings can significantly increase sound levels. Finally, repeat the noise measurement under comparable SAE J1169 test conditions to confirm that the muffler and supporting components deliver consistent, measurable results.

Aria

Aria

Aria is a dedicated marketing professional with a deep passion for innovative strategies and a keen understanding of our company's product offerings. With a wealth of experience in the industry, Aria excels at crafting engaging content that highlights the unique features and benefits of our......